Creamy Baked Mac and Cheese

I know I posted a recipe for homemade baked mac and cheese last week, but this one is a more creamier version and less of a casserole than the other one, as it doesn’t have any egg to bind it together. It’s just as delicious and hits the spot anytime you’re craving something cheesy, gooey and delicious.

Image

Creamy baked mac and cheese with penne pasta and mozzarella


Creamy Mac and Cheese

  • 1 box of pasta, you can use macaroni, penne, radiatore, whatever your preference is
  • 2 cups milk
  • 2 cups cheese, cheddar or mozzarella
  • 1/2 tsp ground mustard powder or 1 tsp yellow mustard
  • 1/3 cup butter
  • Salt, pepper, Nature’s seasoning
  1. Cook your pasta in salted water, drain
  2. Preheat oven to 400 degrees and grease a casserole dish or pan
  3. Add butter and cheese to dish, then the pasta and seasonings. Stir very well.
  4. Pour milk over pasta and stir again.
  5. Sprinkle with more cheese if you’d like
  6. Bake for 20 mins with the lid on, and 10 minutes with the lid off. The lid is actually optional but I like to use it so my pasta doesn’t burn
  7. Serve hot! Also keeps well in the fridge for a few days


Crockpot Spaghetti Bake

This is a great recipe for when you don’t have a lot of time to make dinner! The end result is hearty and much better than your normal “heat the sauce up in a pan, boil your spaghetti and put it all together on a plate” spaghetti dinner.

Image

One pot spaghetti bake

Using my crockpot marinara sauce recipe (with or without meat), add 1 box of spaghetti, uncooked, and stir. The spaghetti cooks right in with the pasta sauce for a yummy pasta that isn’t too salty or sticky or bland. Stir every 30 minutes for about 1.5-2 hours and you’re all set! We serve this with salad and some garlic bread.


Personal sized apple crisp

Okay so I know it’s not fall. Yet I’m posting an apple crisp recipe (gasp). Apples are good any damn time of the year. I also feel less guilty for eating this since it has fruit and oatmeal in it, that’s a healthy breakfast right?

I didn’t have a pan at the time I was craving apple crisp so I used muffin tins instead. The results? Just as yummy apple crisp in individual sized portions.

Individual Apple Crisp

Individual Apple Crisp

Apple Crisp

  • 6-8 apples, peeled cored and cut into 1-inch sized pieces. I use gala or honeycrisp apples, sometimes throw a few granny smith in there to keep things interesting
  • 1 1/2 cups white flour, can substitute 1/2 cup of wheat flour if you’re feeling dangerous
  • 1 1/2 cup oats
  • 4 tbsp softened butter or margarine
  • 1/2 tbsp cinnamon plus 1/2 tsp
  • 1/3 cup packed brown sugar plus 1 tbsp

1. Mix up your dry ingredients in a large bowl

2. Preheat oven to 350 degrees. Grease your muffin tins

3. Toss apples with 1 tbsp of brown sugar and 1/2 tsp cinnamon

4.Evenly divide apples into each hole in a muffin tin. Mine made 6 large muffins, but I’ve also made this in a 12 smaller muffin tin.

5. Cut butter into dry ingredients then layer onto apples.

6. Bake for 30 mins or until apples are tender!

The bigger muffin pans might take a little longer to cook. I covered mine with tin foil for the first 20 mins and then uncovered them and baked for 15 mins more so the top of the crisp wouldn’t burn.


How to make a roux

Roux are very important in cooking, at least the cooking I do. My philosophy with food is go big or go home. If I’m making something, it’s going to taste good, and it’s going to look and taste how I want it to. Roux helps with that philosophy. It helps me achieve my dreams. It’s pretty special.

Flour and cornstarch are good thickeners. Except cornstarch has a weird taste and consistency in large quantities. Dropping flour in a pot of boiling water is comical. It just boils right up into a powdering, yucky mess that won’t blend in with your soup and will taste terrible. That’s why we make roux.

Roux are used to thicken soup, or as a base for soup, or to make gravy. Soups helped by roues are chicken and dumplings, potato soup, broccoli and cheese soup, pretty much anything creamy.

The idea is to mix flour with hot fat, and then liquid. As it cooks in liquid it gets thicker, but not too thick. How much you use depends on how thick you want to make something and the amount of liquid you need to thicken.  Here’s what you do:

Roux

  • 3 tbsp Butter and/or grease from chicken, beef, etc
  • 3/4 cup Flour
  • 1 cup Milk or broth

1. In a medium saucepan, melt your butter/fat on medium-high heat

2. Once heated, sloooowly add the flour. Constantly whisk the mixture until it turns a light golden brown

3. This is when you can add your liquid. Turn off the heat source and slowly add the liquid. Keep whisking.

4. This is when you can incorporate it into your soup. Pour it into your soup and stir.

If you’re making a gravy out of your roux, use grease the meat instead of butter, skip the milk and add more liquid until it reaches your desired consistency.

Chicken and dumplin soup thickened with a roux

Chicken and dumplin soup thickened with a roux


Chicken and Dumplins

This is one of my favorite meals. My family always requests it when I make dinner. It is so filling and hearty and wonderful that it’s pretty much a staple in my house.

I’ll split the recipe up into two parts because you can make the dumplings ahead of time if you want or need to, it’s also less confusing. This recipe takes some effort but not as much as you’d think, everyone will think you slaved all day over it. You can just let them think that, I won’t tell 🙂

Chicken and dumplin soup

Chicken and dumplin soup


Dumplins

  • 2 cups flour
  • 1/2 tsp baking powder
  • 1/2 tsp salt
  • 2 tbsp butter, softened
  • 1 cup milk
  1. Mix the dry ingredients together in at least a medium sized bowl.
  2. Cut in the butter, I usually just squish it with my hands
  3. Pour in the milk, depending on the humidity you might need a little less than a full cup or a little more, so go slow and stir as your pour it in. You want the dough to be sticky but not too wet.
  4. If you are saving the dough for later, form into a ball and wrap in plastic wrap, store in the fridge or freezer.
  5. Liberally flour a surface like a counter or baking sheet. Roll the dough out, making it pretty thin. The baking powder makes it rise when cooking, and the thicker they are the longer they’ll take to cook.
  6. Cut into squares using a pizza cutter. I make mine into about 1 inch squares.
  7. Drop into boiling water or chicken broth to cook. Stir often and they’ll float when they’re done. You can add the flour from where you rolled the dumplins to the soup to thicken it.

Soup

  • 1 cup chicken broth
  • Salt, pepper, parsley, Nature’s seasoning
  • 2-3 cups cooked shredded or chopped chicken (you can use the meat off of a rotisserie chicken, bake your chicken, or boil frozen chicken with the dumplings and take it out to shred it, then return it to the pot)
  • 2 cups mixed vegetables (corn, carrots, celery, peas, whatever you have or prefer)
  • 1/3 cup diced onion
  1. Add your vegetables to the soup about 5 minutes after you add the dumplings. They take a while to cook. Then add the chicken and seasonings.
  2. Sometimes mine needs to be a little thicker. You should wait to thicken the soup until everything has already cooked, meaning the dumplings and vegetables. Make a roue and add it to your soup. Let simmer for at least 15 mins to let it thicken.
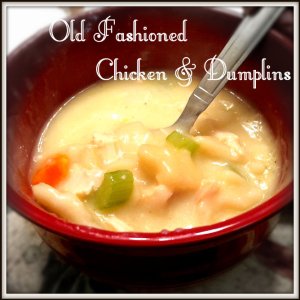
Old fashioned chicken and dumplins

Old fashioned chicken and dumplins

-The roue is optional and only if you want a thicker gravy-like sauce compared to a thinner soup.

-The veggies are optional! They add a nice flavor to the broth and make it more of a meal.

-Things I like to serve with this are corn, fried apples, biscuits and baked beans.


Twice Baked Sweet Potatoes

These are a twist on sweet potato casserole. These directions are for one large or two medium sized sweet potatoes, simply double or triple the recipe if you want to make more!

Twice Baked Sweet Potatoes

Twice Baked Sweet Potatoes

  • 1 large sweet potato or 2 medium sized
  • 1.5 tbsp packed brown sugar
  • 1 tbsp butter
  • 2 large marshmallows
  • 1/8 cup chopped pecans (optional)
  1. Wash your taters well and then pierce them with a fork one or twice. You can either microwave for approximately 10 minutes or bake for 45 minutes at 375 degrees. They need to be soft inside
  2. Cut each potato in half lengthwise and allow to cool for a few minutes.
  3. Preheat your oven to 350 degrees
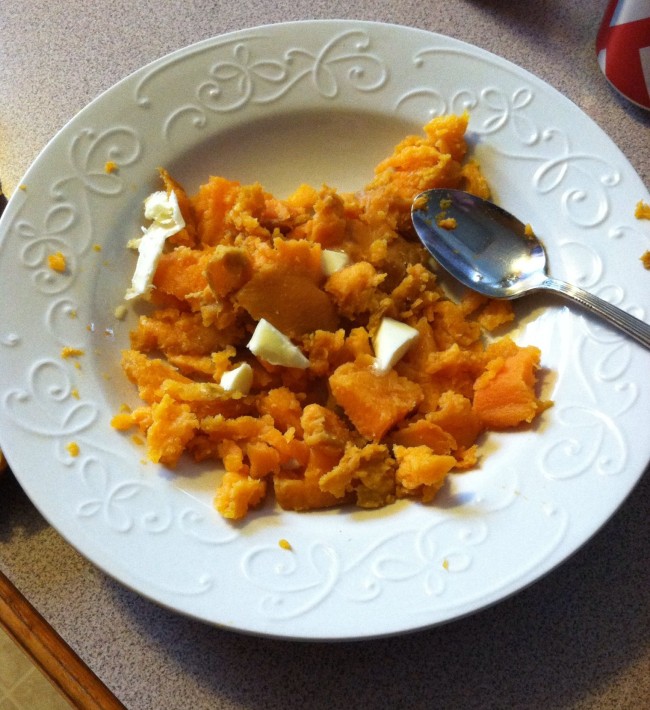
  4. Measure butter, brown sugar and pecans if using them into a bowl. Carefully scoop out the insides of the potato into the bowl and mush it all together.
Mashing sweet potatoes

Mashing the sweet potatoes for twice baked potatoes

5. Scoop the mixture back into the potato skins. Top with a marshmallow or two and back for 20 minutes or until marshmallows are light golden brown

Image

Sweet potatoes all ready to be put in the oven

Enjoy! Let me know if you like this recipe

Twice Baked Sweet Potatoes

Twice Baked Sweet Potatoes


Homemade Baked Mac and Cheese

Homemade mac and cheese is so easy and so good that your family will be begging for more. It heats up well in the microwave or oven so I like to make a big batch and keep some in the fridge to heat up when I’m hungry and don’t want to cook.

Yummy homemade baked macaroni and cheese

Baked Mac and Cheese

  • 1 box macaroni
  • 2 eggs
  • 1/2 cup melted butter
  • 2 cups cheddar cheese
  • 1 tsp dry mustard powder (or 1 tsp yellow mustard)
  • Salt, pepper, Natures Seasoning
  • 2 cups milk
  • 1/2 cup cheese
  1. Boil your macaroni until tender, drain.
  2. Preheat your oven to 375 degrees and grease a loaf pan or casserole dish
  3. Crack your eggs into a large bowl and whisk together. Stir in the melted butter and spices then the cheese
  4. Add the macaroni to the bowl and stir until everything is incorporated
  5. Pour the macaroni mixture into your pan/dish
  6. Now pour the milk evenly into the pan, kinda poke and shake the pan so the milk can get into all the little spaces.
  7. Sprinkle with 1/2 cup (or more!) of cheese and cover before placing in the oven. I like to cover it for 45 minutes and take the lid off for the last 15 minutes or so to get everything nice and browned. Cook for 1 hour or until it looks done!

Enjoy!

Homemade Baked Mac and Cheese

Homemade Baked Mac and Cheese


Homemade marinara sauce

Have you ever made your own marinara sauce? If you haven’t, you should. Like tonight. Or tomorrow. Or this weekend. It is so worth every second of effort you put into it, which isn’t a lot. It’s so easy and so wonderfully delicious. It doesn’t require a lot of time, is pretty easy and you’ll be amazed at the results. If you’re going to make any of your family’s staples homemade, this should be one of them.

What makes it so delicious is the cooking time. The natural sugars in the tomatoes caramelize and create something you thought only your favorite pizza place was capable of. And while I’m sure your favorite pizza place is wonderful, you can recreate that depth of flavor at home.

You will need a crockpot. This allows for an even cooking method at a low temperature for a long time. Low and Slow.

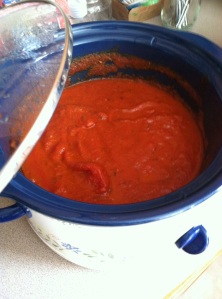
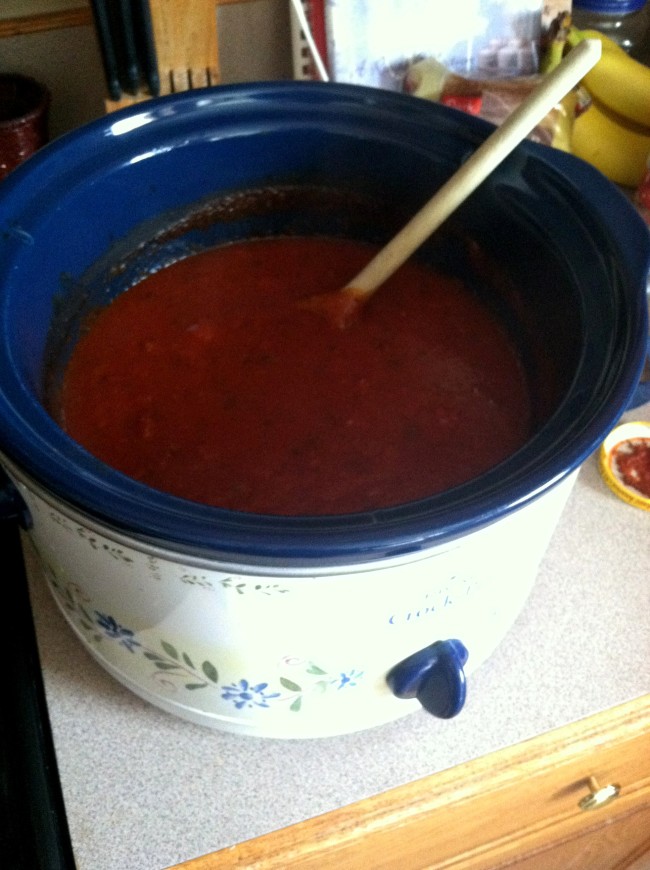
Marinara sauce cooking in the crockpot

Marinara sauce cooking in the crockpot

Homemade Marinara Sauce

  • 2 large cans tomato sauce
  • 1 can crushed tomatoes
  • 1 can diced tomatoes
  • 3 cloves garlic, peeled and chopped into tiny pieces
  • 1-2 tsp brown sugar (white works too!)
  • 1 tsp basil
  • 1/2 tsp salt
  • 1 tbsp Italian seasoning
  • 1/2 tsp onion powder or 1/4 cup diced onion
  • 1/2 tsp crushed red pepper flakes
  • 1/2 cup water

Optional:

1.5 pound browned ground beef

1/4 cup diced onion

1/2 cup diced green or red bell pepper


Spray your crockpot with cooking spray like Pam. Then pour in all your ingredients and stir! Cook on low for 8 hours or high for 4-6 hours, stirring every hour.

After it’s done, I usually refrigerate some and freeze some. It also is a good recipe for doubling! It freezes well.

This also makes a fabulous pizza sauce. To use as pizza sauce, omit the water.

Also adjust the sugar and spices to taste. I like mine a bit sweeter, sometimes I add more sugar, but I would make it like this first to see how you like it because it does sweeten after the cooking process.

Image

Homemade marinara sauce

Marshmellow topped brownies

I’m the type of person who eats for texture rather than taste. Not that I don’t like food that tastes good, but more that I don’t like food with textures I don’t like. Such as raw tomatoes or raw mushrooms; these foods cooked I’d eat every day of the week, but I can’t stand ’em raw. Anywho, I noticed that I like brownies a lot more if they have nuts in them, and are topped with something gooey. I usually make Turtle Brownies with walnuts and caramel, but I’ve been at my moms for a few days and she does not have caramel. So I improvised, and this might be something that everyone else in the world has figured out is fabulous and this is just new to me, but let me tell you, it’s fabulous.

I took some gooey, perfectly slightly underbaked brownies and put a few marshmallows on top of them during the last 5 minutes or so of baking. Look how delicious they look:

Image

Gooey, marshmallow topped brownies

This also works for already cooled brownies, load them up with marshmallows and just pop them in the oven at 300 degrees. Gooey deliciousness, perfect for people who need a lot of different textures to enjoy a brownie.